Communication#
Unlock the full communication potential of the DualMCU ONE board with built-in Wi-Fi, Bluetooth, and Serial capabilities.
Wi-Fi#
Learn how to set up and use Wi-Fi communication on the DualMCU ONE board.
import machine
import network

wlan = network.WLAN(network.STA_IF)
wlan.active(True)
wlan.connect('your-ssid', 'your-password')

while not wlan.isconnected():
    pass

print('Connected to Wi-Fi')

# Check the IP address
print(wlan.ifconfig())
#include <WiFi.h>

const char* ssid = "TU_SSID";
const char* password = "TU_PASSWORD";

void setup() {
Serial.begin(115200);
delay(100);

Serial.print("Conectando a ");
Serial.println(ssid);

WiFi.begin(ssid, password);

while (WiFi.status() != WL_CONNECTED) {
    delay(500);
    Serial.print(".");
}

Serial.println("\nConectado a la red Wi-Fi");
Serial.print(" IP: ");
Serial.println(WiFi.localIP());

Serial.print(" MAC: ");
Serial.println(WiFi.macAddress());
}

void loop() {
// No se necesita hacer nada más en loop
}
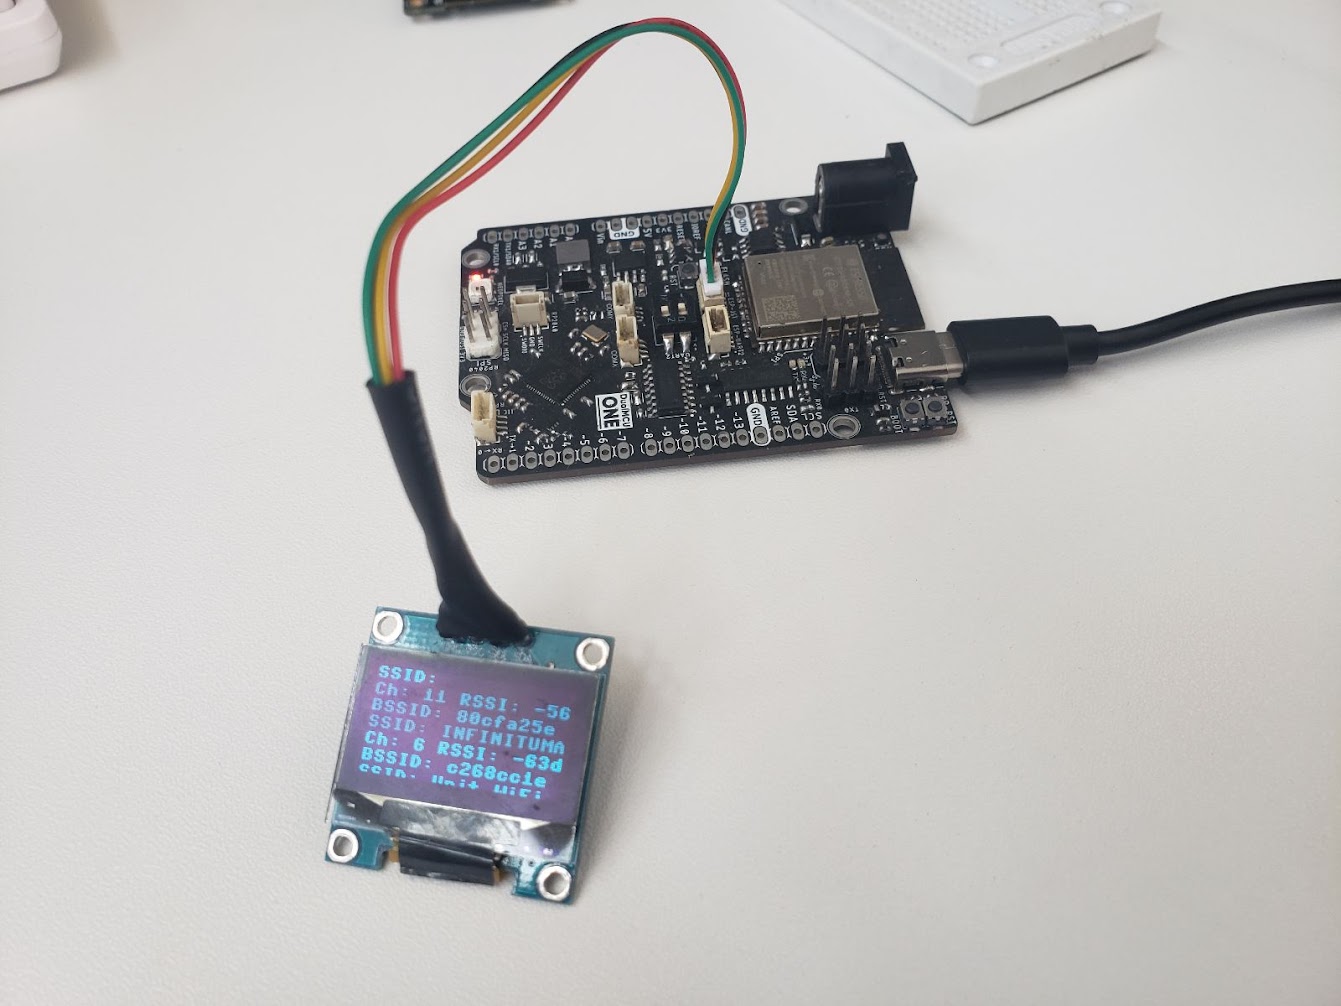
Scan Wi-Fi Networks#
Scan for available Wi-Fi networks and display the results on an OLED display.
import network
import time
import machine
from machine import I2C, Pin
from ocks import SSD1306_I2C

# Initialize I2C for the OLED display
# i2c = I2C(-1, scl=Pin(22), sda=Pin(21))
i2c = machine.SoftI2C(freq=400000, timeout=50000, sda=machine.Pin(21), scl=machine.Pin(22))
oled_width = 128
oled_height = 64
oled = SSD1306_I2C(oled_width, oled_height, i2c)

# Initialize WiFi in station mode
sta_if = network.WLAN(network.STA_IF)
sta_if.active(True)


def display_networks(networks, start_index, num_display=3):
    oled.fill(0)  # Clear the display
    y = 0
    for i in range(start_index, start_index + num_display):
        if i >= len(networks):
            break
        ssid, bssid, channel, RSSI, authmode, hidden = networks[i]
        ssid_str = ssid.decode('utf-8')
        bssid_str = bssid.hex()
        if len(ssid_str) > 10:
            ssid_str = ssid_str[:10]  # Truncate SSID to fit the display
        display_text1 = f"SSID: {ssid_str}"
        display_text2 = f"Ch: {channel} RSSI: {RSSI}dBm"
        display_text3 = f"BSSID: {bssid_str[:8]}"
        oled.text(display_text1, 0, y)
        oled.text(display_text2, 0, y + 10)
        oled.text(display_text3, 0, y + 20)
        print(display_text1,display_text2,bssid_str)
        y += 30
        if y >= oled_height:
            break
    oled.show()

print("Scanning for networks...")

while True:
    networks = sta_if.scan()
    num_networks = len(networks)
    start_index = 0

    while True:
        display_networks(networks, start_index)
        time.sleep(2)  # Display each set for 2 seconds
        start_index += 3  # Move to the next set of networks
        if start_index >= num_networks:
            start_index = 0  # Wrap around to the beginning
        if len(networks) < 3:
            break  # If there are fewer than 3 networks, don't loop indefinitely

Bluetooth#
Explore Bluetooth communication capabilities and learn how to connect to Bluetooth devices.
import bluetooth
import time

# Initialize Bluetooth
ble = bluetooth.BLE()
ble.active(True)

# Helper function to convert memoryview to MAC address string
def format_mac(addr):
    return ':'.join('{:02x}'.format(b) for b in addr)

# Helper function to parse device name from advertising data
def decode_name(data):
    i = 0
    length = len(data)
    while i < length:
        ad_length = data[i]
        ad_type = data[i + 1]
        if ad_type == 0x09:  # Complete Local Name
            return str(data[i + 2:i + 1 + ad_length], 'utf-8')
        elif ad_type == 0x08:  # Shortened Local Name
            return str(data[i + 2:i + 1 + ad_length], 'utf-8')
        i += ad_length + 1
    return None

# Callback function to handle advertising reports
def bt_irq(event, data):
    if event == 5:  # event 5 is for advertising reports
        addr_type, addr, adv_type, rssi, adv_data = data
        mac_addr = format_mac(addr)
        device_name = decode_name(adv_data)
        if device_name:
            print(f"Device found: {mac_addr} (RSSI: {rssi}) Name: {device_name}")
        else:
            print(f"Device found: {mac_addr} (RSSI: {rssi}) Name: Unknown")
#             pass

# Set the callback function
ble.irq(bt_irq)

# Start active scanning
ble.gap_scan(10000, 30000, 30000, True)  # Active scan for 10 seconds with interval and window of 30ms

# Keep the program running to allow the callback to be processed
while True:
    time.sleep(1)
#include "BluetoothSerial.h"

BluetoothSerial SerialBT;

void setup() {
Serial.begin(115200);
Serial.println(" Starting Bluetooth device scan...");

if (!btStart()) {
    Serial.println(" Could not start Bluetooth");
    return;
}

// Scan for classic Bluetooth devices
int8_t numDevices = SerialBT.discoverAsync([](BTAdvertisedDevice* device) {
    static int found = 0;

    if (found < 10) {
    Serial.print(" Name: ");
    Serial.println(device->getName().c_str());

    Serial.print(" MAC Address: ");
    Serial.println(device->getAddress().toString().c_str());

    Serial.println("---------------------------");
    found++;
    }

    // Cancel scan if 10 devices are already detected
    if (found >= 10) {
    SerialBT.cancelDiscover();
    }
});

if (numDevices == 0) {
    Serial.println(" No devices found.");
} else {
    Serial.println("Scan in progress...");
}
}

void loop() {
// Nothing in loop
}
Web Server - MicroPython#
ESP32 Web Server is a simple web server that knows how to handle HTTP requests such as GET and POST and can only support one simultaneous client. It supports the following HTTP request methods:
GET
POST
PUT
DELETE
PATCH
The server can be started by calling the start method. The server will start listening on the specified port and will call the handler method when a request is received.
Network basics#
The basic connection using MicroPython usage the method connect from the network module. The connect method receives the SSID and the password as parameters. The method ifconfig returns the IP address, the subnet mask, the gateway and the DNS server.
Example of a simple connection to a Wi-Fi network:
import machine
import network

wlan = network.WLAN(network.STA_IF)
wlan.active(True)
wlan.connect('your-ssid', 'your-password')

while not wlan.isconnected():
    pass

print('Connected to Wi-Fi')

# Check the IP address
print(wlan.ifconfig())
The code-block stablish a simple connection with a Wi-Fi network. The while loop waits until the connection is established. The ifconfig method returns a tuple with the IP address, the subnet mask, the gateway and the DNS server.
Tip
The ifconfig method returns a tuple with the IP address, the subnet mask, the gateway and the DNS server. For more information consult the network module documentation.
Web Server - Setup and Usage#
Clone the repository:
git clone https://github.com/UNIT-Electronics/DualMCU_Advanced_Projects.git
Go to the web_server directory:
cd Projects/1. Web Server
This directory contains the following files:
Desktop - Contains the files for the desktop web server
ESP32-MicroPython - Contains the files for the ESP32 web server
Desktop#
The directory Desktop contains the files for the desktop web server. Although the server is running on the desktop, it can be used to control an ESP32 running a web server.
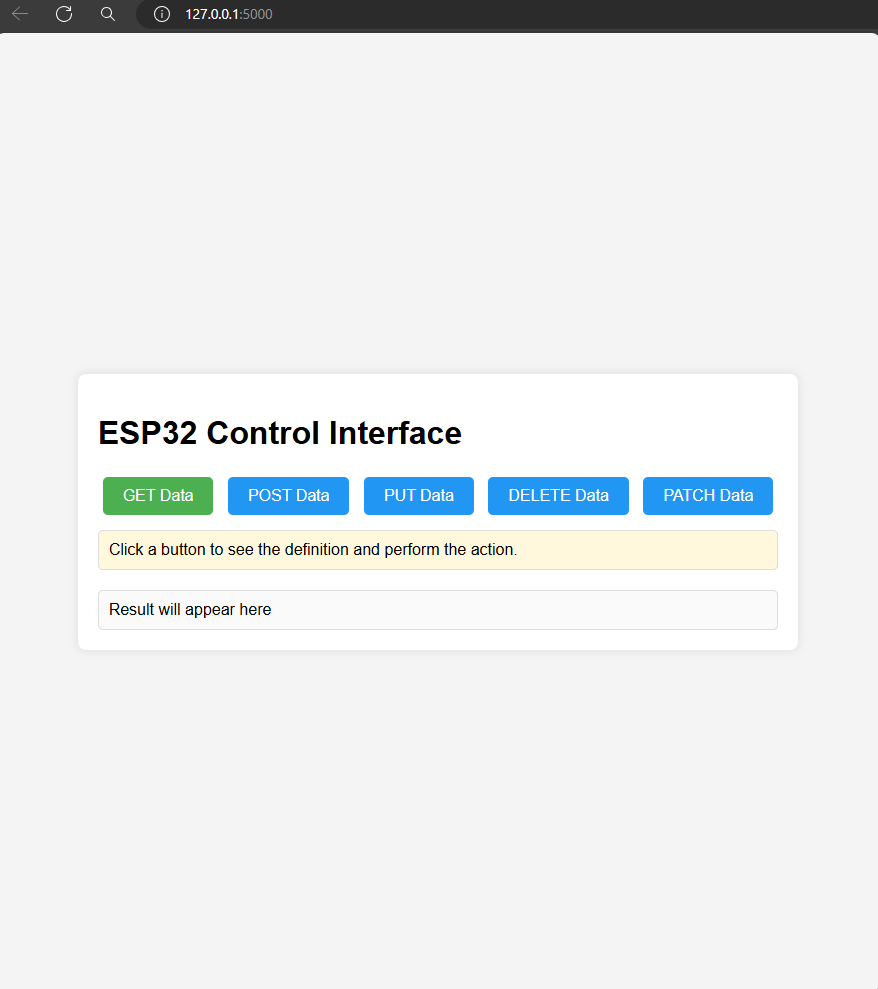
Why use a desktop web server?, you may ask. The desktop web server can be used to test the ESP32 web server and interact with it without having to run the code on the ESP32. This can be useful for debugging and testing the web server without having to upload the code to the ESP32 every time.

Fig. 33 Desktop Web Server#
The code describe methods to handle the HTTP requests. Each method receives the request and the response as parameters. for example, the get method handles the GET request and the post method handles the POST request.
Flask#
Flask is a lightweight WSGI web application framework. It is designed to make getting started quick and easy, with the ability to scale up to complex applications. It began as a simple wrapper around Werkzeug and Jinja and has become one of the most popular Python web application frameworks.
To install Flask, run the following command:
pip install Flask
Run the desktop web server by running the following command:
python app.py --ip <ESP32_IP>

Fig. 34 Desktop Web Server#
ESP32-MicroPython#
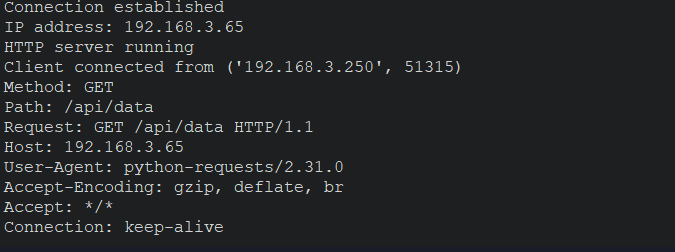
The directory ESP32-MicroPython contains the files for the ESP32 web server. The main.py file contains the code for the ESP32 web server.

Fig. 35 ESP32 Web Server#
Extra information#
How to install MicroPython on ESP32: MicroPython ESP32
How to install MicroPython on DualMCU-ESP32: MicroPython ESP32
DualMCU - First generation: DualMCU
DualMCU - Getting started: DualMCU - Getting started
DualMCU - Libraries: DualMCU - Libraries
