Compile and Flash CH55x with SDCC#
Running a Program#
To execute the program, open a Bash terminal or Git Bash terminal on Windows. Follow these steps to clone the examples repository, navigate to the desired directory, and compile the project.
Clone the Examples Repository
Begin by cloning the examples repository which contains the main code. Open your bash terminal and execute the following command:
git clone https://github.com/UNIT-Electronics/CH55x_SDCC_Examples
Navigate to the Example Path
Once the repository is cloned, navigate to the path where the example programs are located. Use the following command to change the directory:
cd ~/CH55x_SDCC_Examples/Software/examples/Blink/
Connect the Device
Connect your CH55x device to your computer. Ensure that you press and hold the BOOT button while connecting the device. This is essential for the device to enter programming mode.
Compile the Project
To compile the project and generate the necessary files, execute the following command in your terminal:
make allThis command will compile the project, resulting in the generation of files with various extensions necessary for flashing the microcontroller.

Fig. 8 Compilation output files#
Install pyusb#
pyusb is a Python module necessary for flashing the CH55x microcontroller. To install pyusb, follow these steps:
Install pyusb on using pip
python3 -m pip install pyusb
Then verify the installation
python3 -m pip show pyusb
For Windows, you can use the following command:
pip install pyusb
Error with pip#
If you encounter this error, we recommend installing the Python environment:
sudo apt install python3-venv
Create an environment:
python3 -m venv .venv
Activate the environment:
source .venv/bin/activate
And install pyusb:
pip install pyusb
Flashing the Program#
Arduino IDE#
Arduino IDE is a popular development environment for programming microcontrollers. You can use the Arduino IDE to program the CH55x microcontrollers by following these steps:
Install Arduino IDE
Download and install the Arduino IDE on your computer.
Install CH55x Board Support
Open the Arduino IDE and navigate to
File > Preferences. In the Additional Boards Manager URLs field, add the following URL:https://raw.githubusercontent.com/UNIT-Electronics/Uelectronics-CH552-Arduino-Package/refs/heads/develop/package_duino_mcs51_index.json
Install CH55x Board
Go to
Tools > Board > Boards Managerand search forCocket Nova. Install the CH55x board support package.
Note
Requires the ch372 driver to be installed.
WCHISPTool#
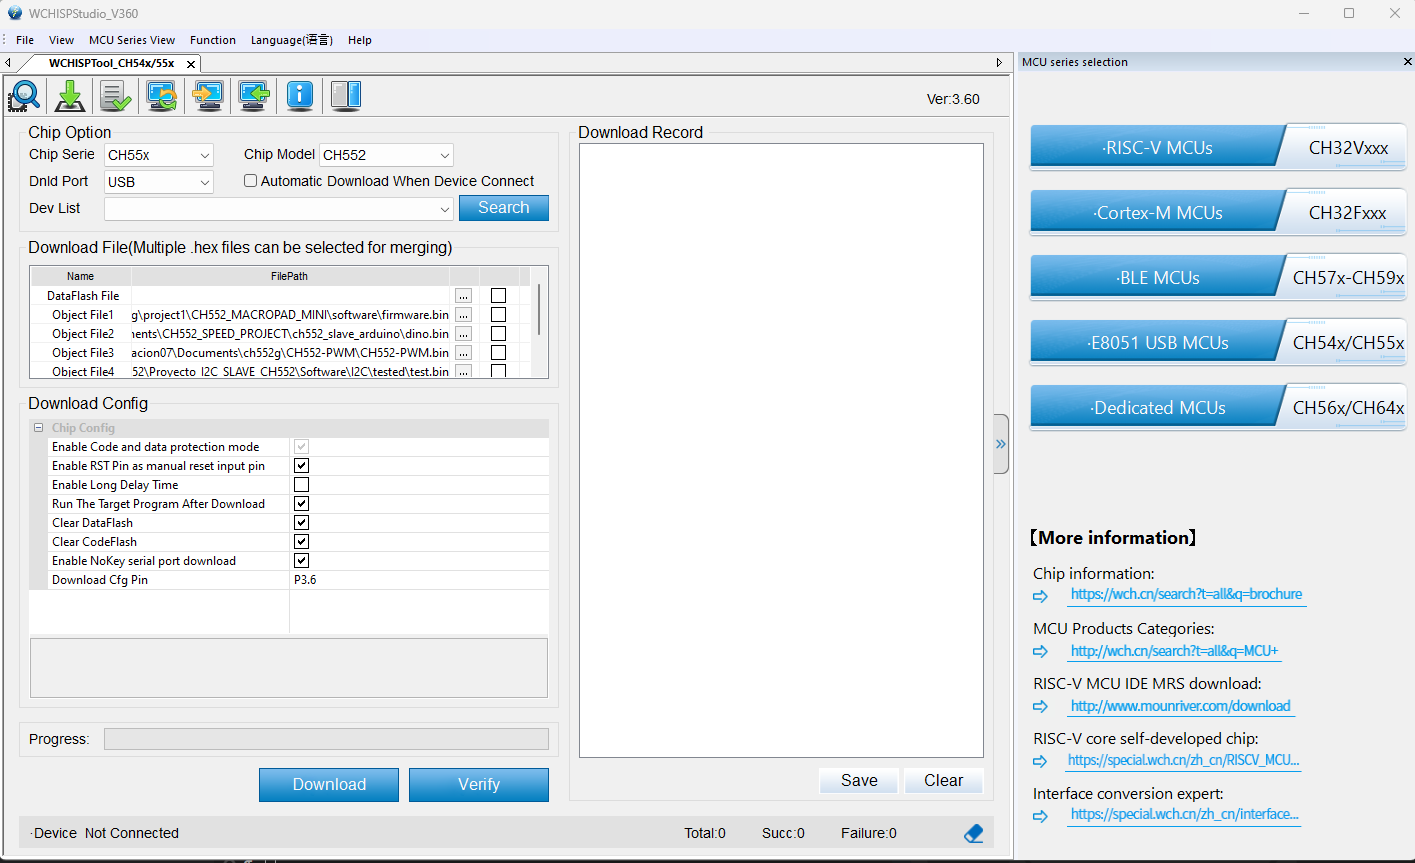
The WCHISPTool is an official programming tool provided by WCH. It is a Windows-based tool that allows users to flash firmware onto CH55x microcontrollers. To use the WCHISPTool, follow these steps:
Download the WCHISPTool
Download the WCHISPTool from the official WCH website.
Install the WCHISPTool
Install the WCHISPTool on your Windows computer by following the on-screen instructions.
Connect the Device
Connect your CH55x device to your computer using a USB cable. Ensure that the BOOT button is pressed while connecting the device.
Flash the Program
Open the WCHISPTool and select the appropriate firmware file. Click the “Download” button to flash the program onto the microcontroller.
Note
The WCHISPTool is a Windows-based tool and may not be compatible with other operating systems.

Fig. 9 WCHISPTool interface#
Warning
The WCHISPTool is an official tool provided by WCH and may have limitations compared to other flashing methods.
Note
Requires the ch372 driver to be installed.
chprog.py#
Project: chprog - Programming Tool for CH55x Microcontrollers
Version: v1.2 (2022)
Credits Stefan Wagner
GitHub: wagiminator
License: MIT License
Description: Developed chprog, a Python tool for easily flashing CH55x series microcontrollers with bootloader versions 1.x and 2.x.x.
Caution
Support available up to bootloader version 2.4.0, windows only.
References: Inspired by and based on chflasher and wchprog by Aaron Christophel and Julius Wang:
Once the project is compiled, you need to flash the program onto the CH55x device. Follow these steps:
Connect the Device
Ensure your CH55x device is connected and the BOOT button is pressed, as done during the compilation step.
Flash the Program
Execute the following command to flash the compiled program onto the microcontroller:
python ../../tools/chprog.py main.bin

Fig. 10 LED blinking effect#
Note
Requires the libusb-win32 driver to be installed using Zadig.
Loadupch#
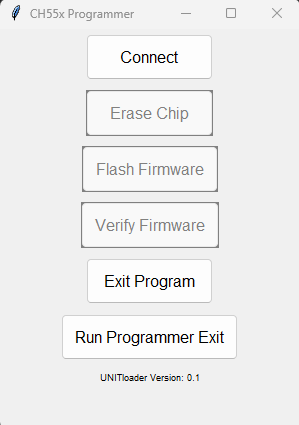
The Loadupch is a software development prototype designed to facilitate the uploading of code to the CH552 microcontroller. It is a user-friendly tool that provides a graphical interface, making it easier for users to upload their code. Based on chprog, Loadupch is a Python tool that simplifies the process of flashing CH55x series microcontrollers with bootloader versions 1.x and 2.x.x.
Caution
Support available up to bootloader version 2.4.0, windows only.

Fig. 11 Loadupch tool interface#
Installing Loadupch#
Warning
The Loadupch tool is currently under development and may contain bugs. Use it at your own risk.
To install the Loadupch tool, you can use pypi. Follow these steps:
Install Loadupch
Use the following command to install the Loadupch. tool via pip:
pip install loadupch
Run Loadupch
After installation, you can run the Loadupch tool with the following command:
python -m loadupch
Caution
To recognize the device, you only need to install the
libusb-win32driver using Zadig.This will launch the graphical interface of the Loadupch tool, allowing you to upload code to your CH552 microcontroller easily.
Tip
If you need to uninstall the Loadupch tool for any reason, use the following command:
pip uninstall loadupch
Note
Requires the libusb-win32 driver to be installed using Zadig.
