DualMCU: MicroPython
In this section, we will provide a basic example of installing MicroPython on the DualMCU ESP32 microcontroller. Our objective is to streamline this process, enabling you to seamlessly integrate it into your projects.
To begin, follow the simple connection diagram: connect the DualMCU unit using a USB Type-C connector. This initial step will allow you to explore and familiarize yourself with the functionality of MicroPython efficiently.
We hope this guide simplifies the process, providing you with a better understanding and utility for future projects!

Remember, when working with DualMCU, you have the flexibility to interchange between microcontrollers using the change interrupt.
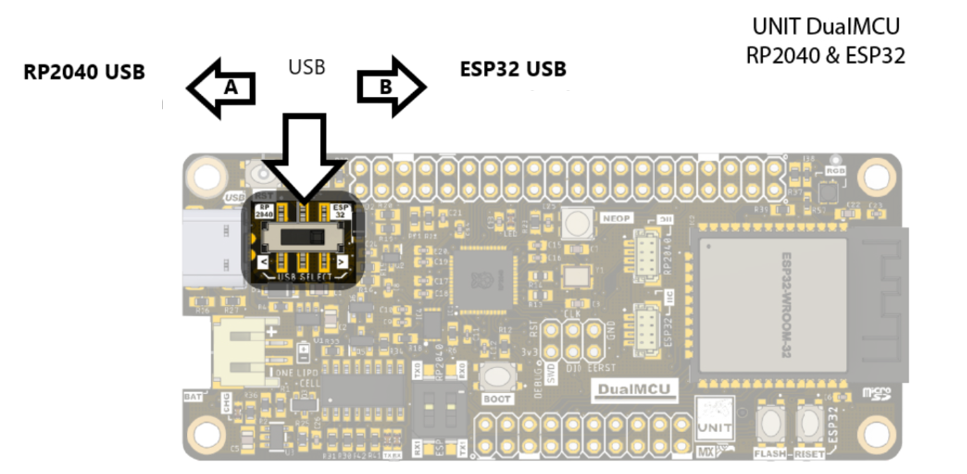
NOTE If the UNIT DUALMCU ESP32 is not recognized, it will be necessary to install the CH340 DRIVER.
Environment Configuration
Before starting, we recommend configuring your environment with the following settings:
Install Thonny to facilitate the firmware download to the DualMCU ESP32.
Navigate to “Run” -> “Config interpreter”

When you do this, the following window will open:
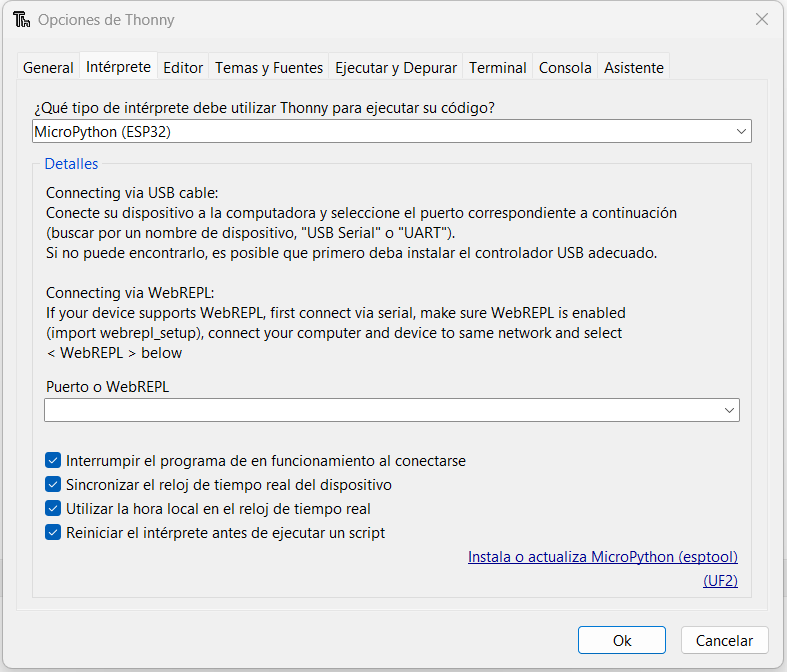
ESP32 Firmware Update
Start the DualMCU UNIT with the ESP32 microcontroller in Position A by pressing the FLASH button and connecting the device to the PC.

Click on “Install or Update MicroPython”.
A new window will open.
- It is recommended to use the following configuration:
- Variant: Espressif ESP32/WROOM
- Version: 1.20.0
- It is recommended to use the following configuration:
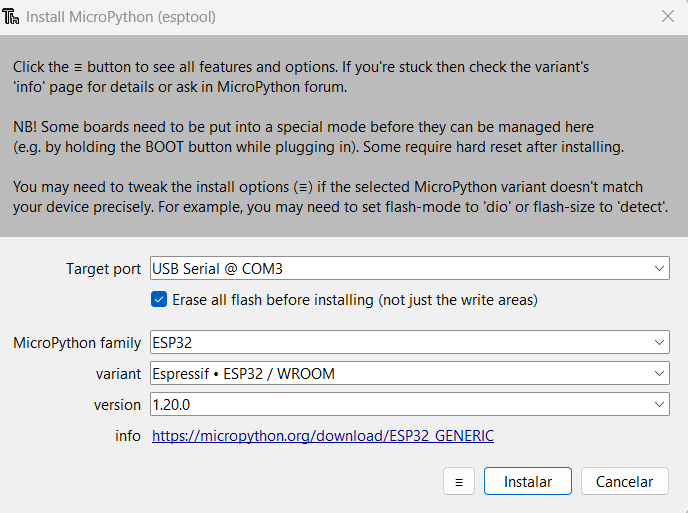
- Press install (wait for the installation to finish).
Select the board you want to work with at the bottom of Thonny. You can find this option in a format similar to the one shown in the following image for the ESP32. Note that the COM port is assigned by the machine and may vary.

RP2040 Firmware Update
Start the DualMCU UNIT with the RP2040 microcontroller in Position B by pressing the BOOT button and connecting the device to the PC.
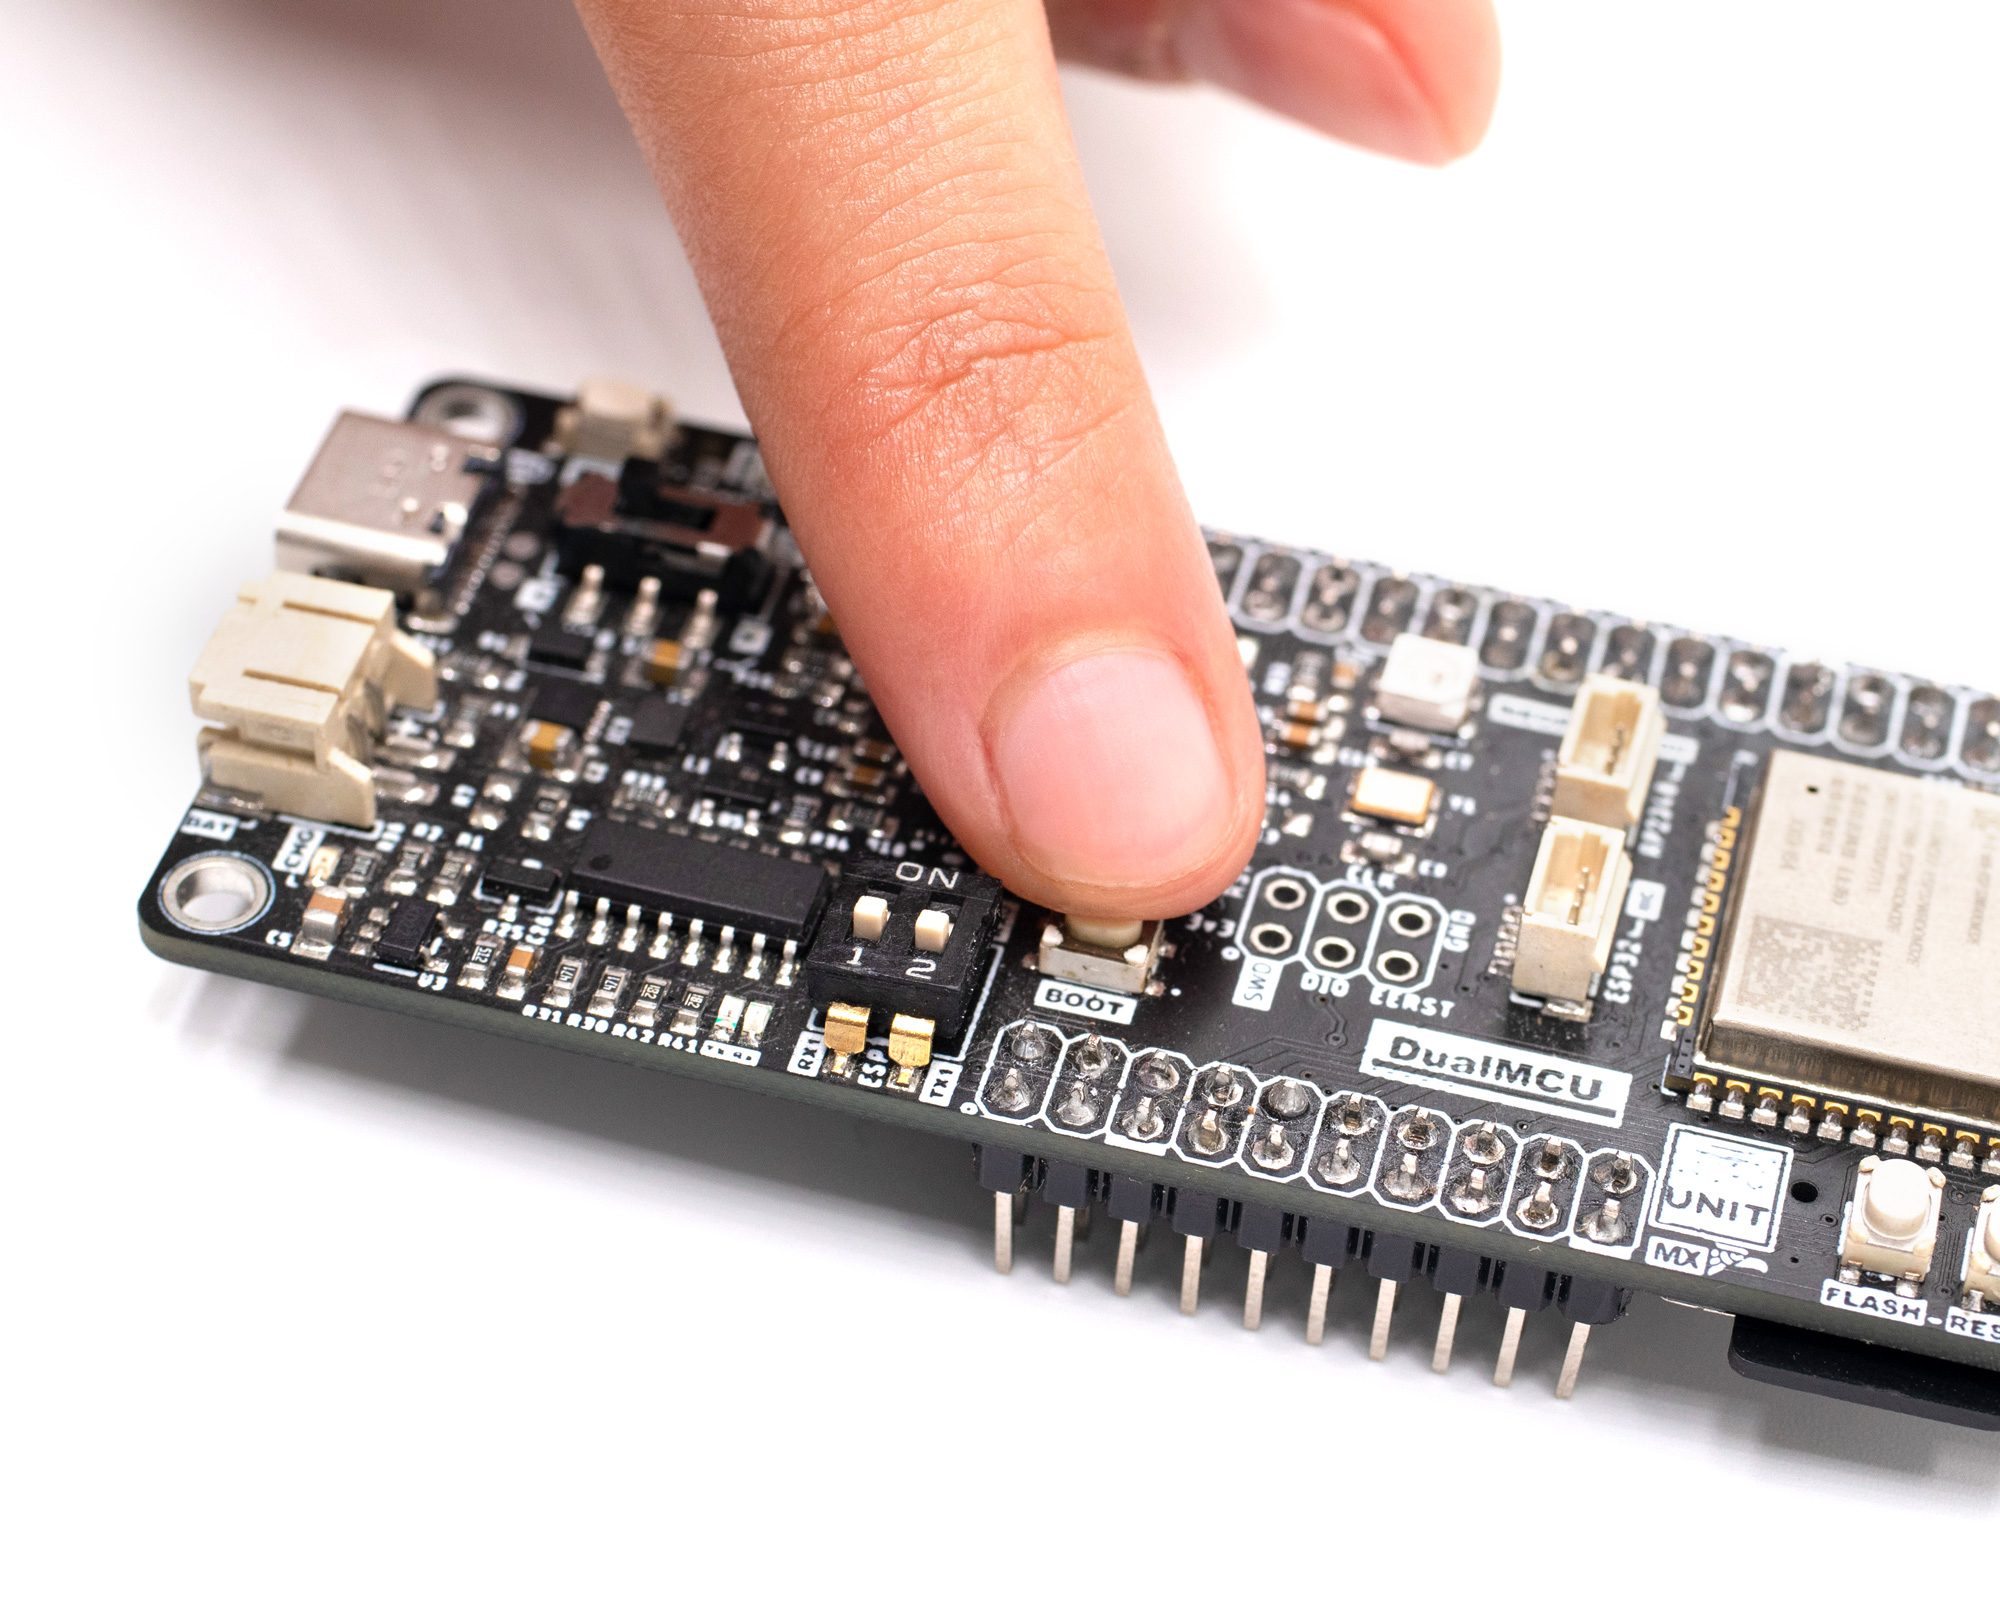
Click on “Install or Update MicroPython”.
A new window will open.
- It is recommended to use the following configuration:
- Variant: Raspberry Pi Pico/Pico H
- Version: 1.22.2
- It is recommended to use the following configuration:
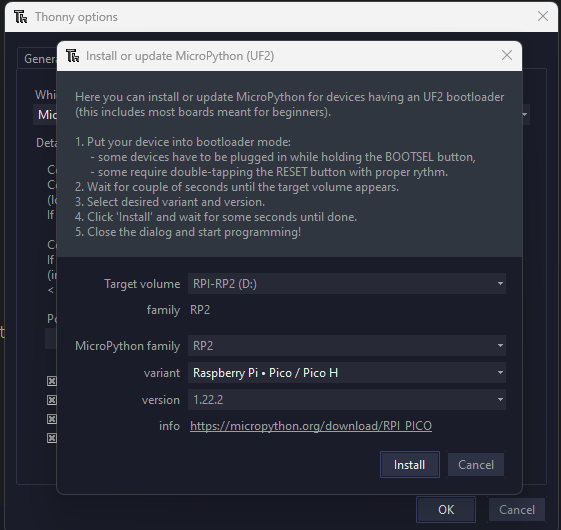
- Press install (wait for the installation to finish).
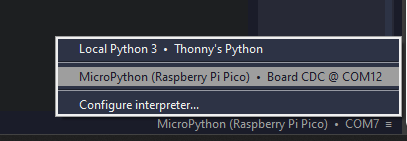
Select the board you want to work with at the bottom of Thonny. You can find this option in a format similar to the one shown in the following image for the RP2040. Note that the COM port is assigned by the machine and may vary.
Loader your firts “Hello, World” 🌎
Once your device is configured and tested, we recommend creating your “Hello, World” using the following code practices:
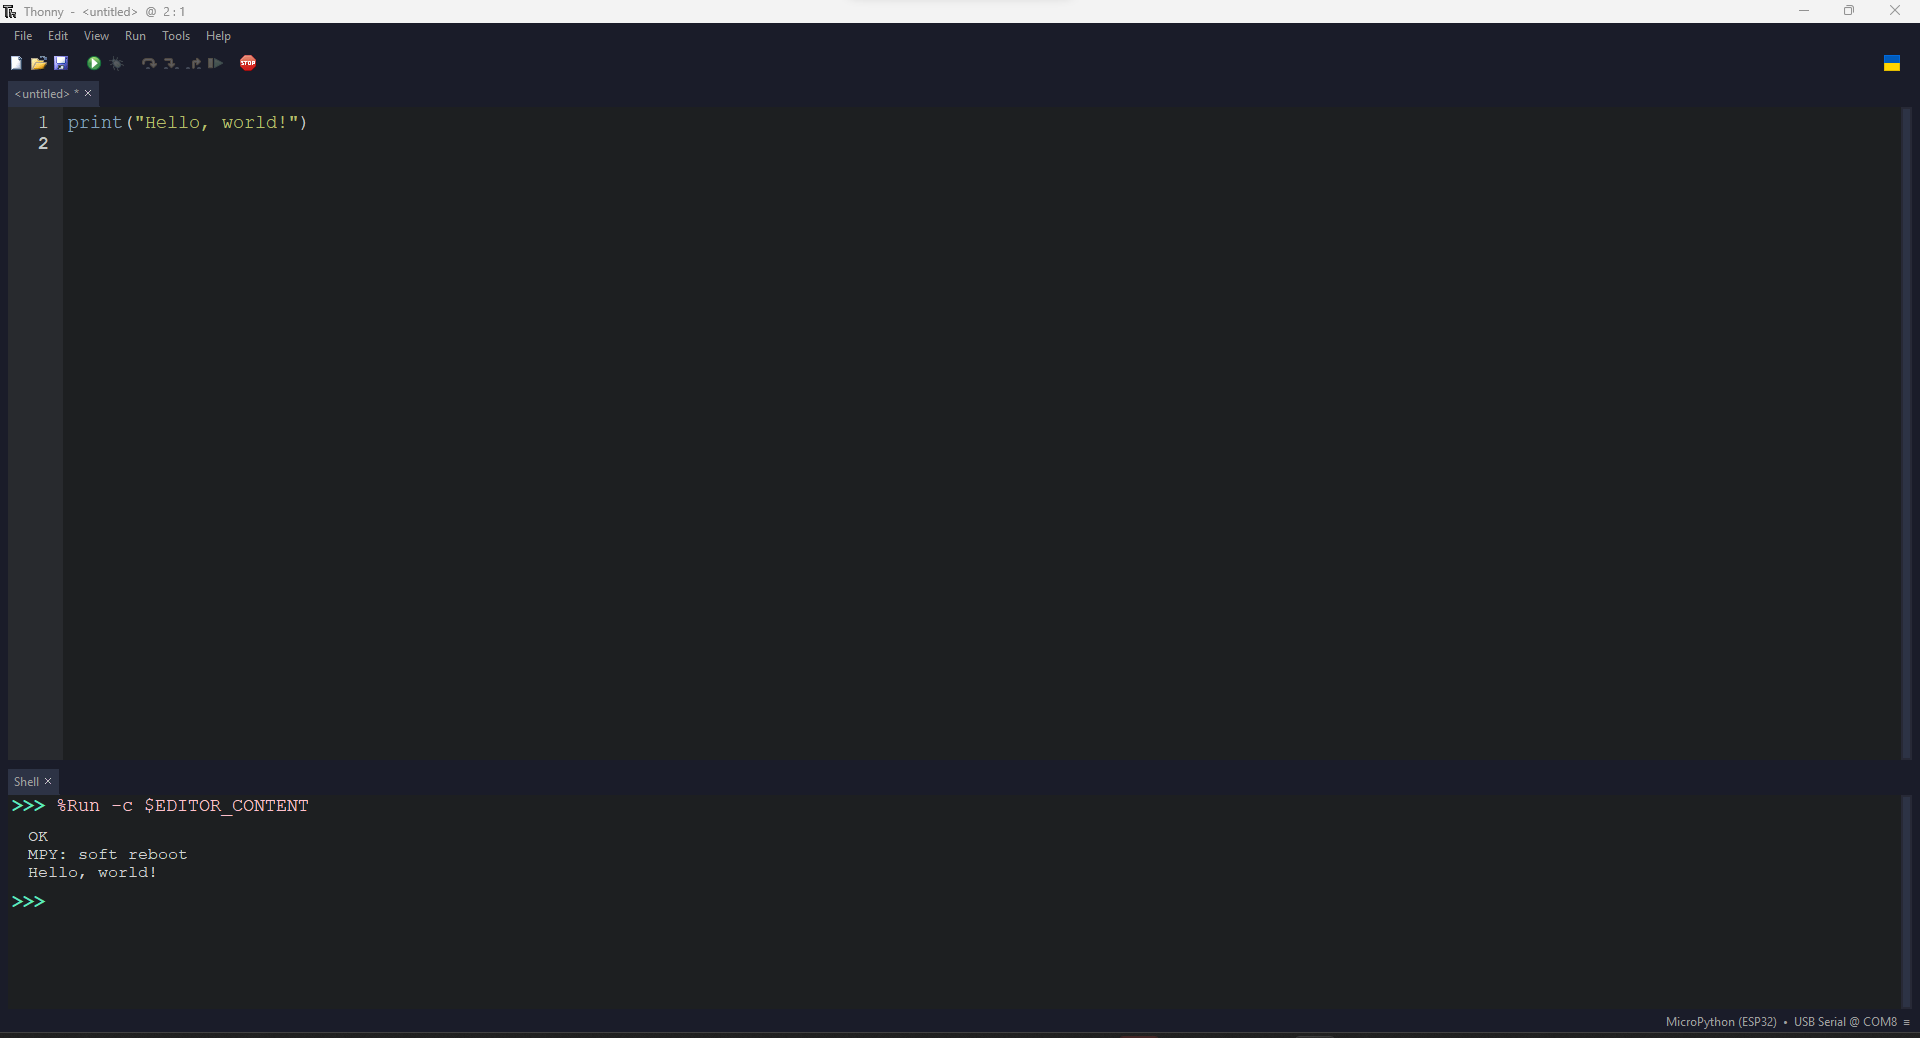
Copy and paste the following code:
print("Hello, world!")
Run code. You can find a green button at the top part of the interface:
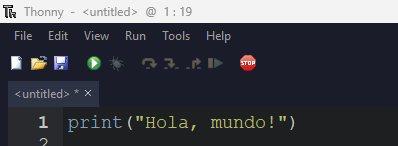
You will see the result in the serial shell:

This simple step introduces you to the MicroPython environment and establishes the foundation for the following exercises. Explore and enjoy your MicroPython programming experience!
Next course LED Blinking
⌨️ with ❤️ from UNIT-Electronics 😊