Exercises with DualMCU - MicroPython
11. Wireless communication
Objective
This practice provides resources for the implementation of a local network server and client using the DualMCU development board, leveraging the capabilities of microcontroller ESP32.
NOTA In this practices, you will use the microcontroller ESP32.
Description
The DualMCU board leverages the functionality of the ESP32 microcontroller as both a server and a client to connect to a local network. This project requires a solid foundation in both electronic and programming areas.
Materials
Connection Diagram

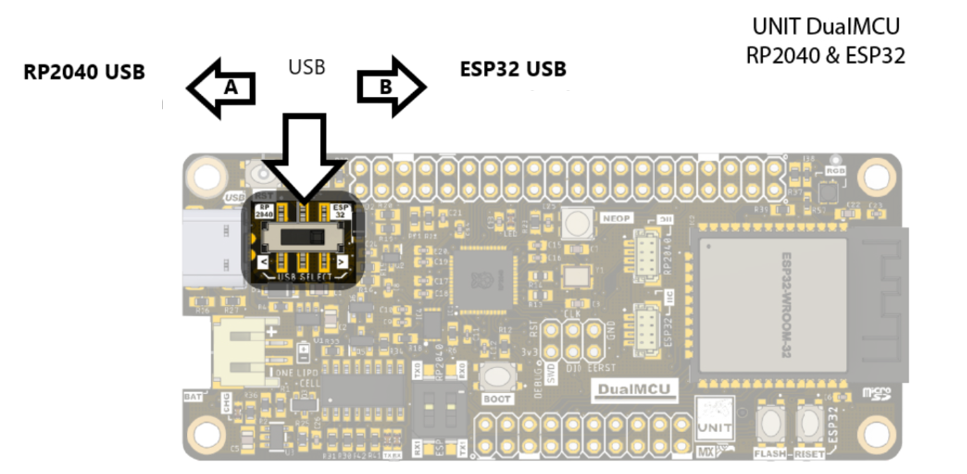
NOTE Remember that when working with the DualMCU, you can switch between microcontrollers using the change switch. For this practice, we will only use the ESP32 microcontroller, so you should switch the change switch to position “B”.

Software
Para la ejecución de esta práctica la dividiremos en las siguientes etapas de configuración que tendrán que seguirse en ese orden.
For run this practice for divide in the next step for configuration in the next order:
Configuration of a Local Server
The configuration of an environment is an essential step that involves the installation of necessary components to deploy the project as the main resource. It requires a local server to deploy a web service on a local network.
Node.js Installation
To start, you need a web service, and this project is deployed using Node.js.
- Once the download is complete, run the program and select “Install.”
- Later, the terms and conditions screen will appear (we recommend reading). Click the “Next” or “Accept” button.
- We recommend using the default configuration.
- Finally, click “Install.” When the installation is finished, select “Close” or “Finish.”
Verify Your Installation
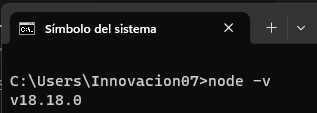
To verify that Node.js and NPM (Node Package Manager) are installed correctly, open the Command Prompt or PowerShell and type the following commands, then press Enter.
node -v

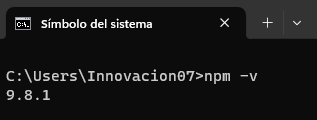
You will see the installed version of Node.js. Next, verify the version of NPM using this command.
npm -v

Basic Use
Node.js is a framework that interprets commands you send to it. To test your installation, you can create a test script with the following steps:
- Open your preferred code editor.
- Copy and paste this code:
var http = require('http');
http.createServer(function (req, res) {
res.writeHead(200, {'Content-Type': 'text/html'});
res.end('Hello World!');
}).listen(8080);
Save the file as ‘app.js’ and confirm the saved path.
Open the command console in the location where the ‘app.js’ file is saved and run the command:
node app.js
The script will run in the background. Open your web browser and enter the following address in the navigation bar:
http://localhost:8080
You will see the text “Hello World!”
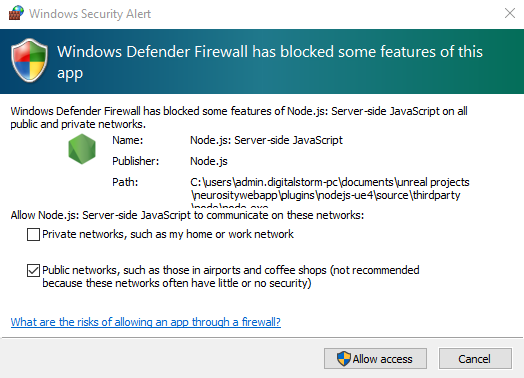
NOTE In some cases, when trying to access externally, a pop-up window may appear. You should allow access to Node.js through your firewall.
Host Configuration
Download or clone the repository. Find the example file in the Control_web_panel directory. As mentioned before regarding the environment configuration, you should run the file app.js with the following steps:
Open the Command Prompt or PowerShell and write the following commands, then press Enter.
node app.js
This message that refente to status enable server, and the direction to conection is
Servidor en funcionamiento en 0.0.0.0:3000
http://localhost:8080

Client Configuration
The ESP32 firmware for running Micropython, can be found in the directory esp32micropython.
You need to follow some steps to configure the code, in particular, enter the data for the WiFi network:
ssid = "SSID"  # Replace with your Wi-Fi network name
password = "PASSWORD"  # Replace with your Wi-Fi network password
Also, change the host in the following line:
server_url = "http://tu_host:3000/endpoint" # Replace with the IP address of your server
You can check the IP address of your device. In Windows, open the command prompt and run the command:
ipconfig
In the “Wireless LAN adapter Wi-Fi” section, find the entry similar to:
IPv4 Address. . . . . . . . . . . . : 192.168.0.2
Replace tu_host with the IP address, for example:
server_url = "http://192.168.0.2:3000/endpoint"
Code
import network
import ubinascii
import machine
import urequests
import time
import _thread

try:
  import usocket as socket
except:
  import socket

ssid = "SSID"  # Reemplaza con el nombre de tu red Wi-Fi
password = "PASSWORD"  # Reemplaza con la contraseña de tu red Wi-Fi

server_url = "http://tu_host:3000/endpoint" # Reemplaza con el nombre de la ip de tu servidor
headers = {"Content-Type": "application/json"}

led = machine.Pin(25, machine.Pin.OUT)
#led_pin2 = machine.Pin(26, machine.Pin.OUT)
shared_variable = 0

# Convierte la dirección MAC del ESP32 en un nombre de host único
def generate_unique_hostname():
    mac = ubinascii.hexlify(network.WLAN().config('mac'), ':').decode()
    return "esp32-" + mac

# Conecta a la red Wi-Fi
def connect_to_wifi():
    wlan = network.WLAN(network.STA_IF)
    if not wlan.isconnected():
        print("Conectando a la red WiFi...")
        wlan.active(True)
        wlan.connect(ssid, password)
        while not wlan.isconnected():
            pass
    print("Conectado a la red WiFi")
    print("Dirección IP:", wlan.ifconfig()[0])

def adc_potenciometer():

    potentiometer_pin = machine.Pin(36)
    adc = machine.ADC(potentiometer_pin)
    adc.atten(machine.ADC.ATTN_11DB)
    return adc


def web_page(adc1):
    led_state = 0
    html = """<html>

    <head>
        <meta name="viewport" content="width=device-width, initial-scale=1">

        <style>
            html {
                font-family: Arial;
                display: inline-block;
                margin: 0px auto;
                text-align: center;
            }

            .button {
                background-color: #F146C2;
                border: none;
                color: white;
                padding: 16px 40px;
                text-align: center;
                text-decoration: none;
                display: inline-block;
                font-size: 16px;
                margin: 4px 2px;
                cursor: pointer;
            }

            .button1 {
                background-color: #304169;
            }
        </style>
    </head>

    <body>
        <h2>Soy el ESP32</h2>
        <p>
            <a href=\"?led_2_on\"><button class="button">LED ON</button></a>
        </p>
        <p>
            <a href=\"?led_2_off\"><button class="button button1">LED OFF</button></a>
        </p>
    </body>

    </html>"""
    return html

def loop1():
    global shared_variable
    while True:
        adc1=adc.read()/4096*100
        data = {"potentiometer_value": str(adc1)}
        response = urequests.post(server_url, json=data, headers=headers)
        response.close()
        time.sleep(0.1)

def loop2():
    global shared_variable
    s = socket.socket(socket.AF_INET, socket.SOCK_STREAM)
    s.bind(('0.0.0.0', 80))
    s.listen(5)

    while True:
      try:
        if gc.mem_free() < 102000:
          gc.collect()
        conn, addr = s.accept()
        conn.settimeout(3.0)
        print('Got a connection from %s' % str(addr))
        request = conn.recv(1024)
        conn.settimeout(None)
        request = str(request)
        led_on = request.find('/?led_2_on')
        led_off = request.find('/?led_2_off')
        if led_on == 6:
            led_state = "ON"
            led.on()
        if led_off == 6:
            led_state = "OFF"
            led.off()
        response = web_page(shared_variable)
        conn.send('HTTP/1.1 200 OK\n')
        conn.send('Content-Type: text/html\n')
        conn.send('Connection: close\n\n')
        conn.sendall(response)
        conn.close()
      except OSError as e:
        conn.close()
        print('Connection closed')


connect_to_wifi()
adc = adc_potenciometer()

# Crear y lanzar los hilos
_thread.start_new_thread(loop1, ())
_thread.start_new_thread(loop2, ())

time.sleep(10)
Run Code
Once you’ve modified the code, you can run it in the Thonny console. You will see an IP address to verify if the ESP32 is connected:
MPY: soft reboot
Conectado a la red WiFi
Dirección IP: 192.168.0.10
Puedes acceder a esta dirección IP desde cualquier dispositivo en la misma red.

The displayed interface controls the LED 25 of the ESP32 and allows to check the functionality of the project.
Finally, the link with the interface integrated with the sending of information by the potentiometer will look something like this:

Conclusion
The practice carried out with DualMCU as a client and server demonstrates the versatility and potential of this device in the field of wireless communication. The ability to efficiently exchange data between a client and a server opens up a wide range of possibilities for IoT applications and embedded systems. The knowledge gained from configuring and operating both roles allows for a better understanding of network operations and how to make the most of the capabilities of the DualMCU development board in different scenarios.
NOTE: Keep in mind that the presented codes are only examples and may require configuration adjustments according to specific needs and requirements.
Continue with the course Communication Between Two Microcontrollers
⌨️ with ❤️ from UNIT-Electronics 😊
